It is true that solar cells can be printed. They can be made at home by simply painting layers of specific material on top of each other. They can also be printed using an inkjet printer. This will be covered in this article including the costs for ink.
There are two different categories of cells, namely Organic and Inorganic PV cells that can be printed. In the inorganic category, it is the Perovskite cells, that have recently generated a lot of excitement. This is because printed organic cells normally have a lower efficiency. However with printed Perovskite cells, we are recording efficiency values that are close to mainstream solar cells.
Before the information on the inks is unpacked, it should be understood how solar cells functions so that we know how to properly print them and learn what makes them work more efficiently.
A solar cell is not complicated at all. In its most basic form, it is simply a layer of photo-voltaic material sandwiched between two layers of electrodes also called charge carriers or sometimes referred to as contacts. Conductive metals are mostly used as contacts. In the industry, Photo-active material is sometimes called active material in the industry.
So can a photo-active layer between copper plates be painted to make a simple solar cell? Well theoretically yes, practically no.
This is because we have to allow as much light as we can to reach the photo-active material. After-all it is the light that knockouts electrons that will be captured by the contacts. If the electrode on the top itself blocks the light reaching the photo-active layer than we won’t have any current. And so at least one contact that faces the sun, ideally should be transparent. If not, than it should be in the form of a mesh, with plenty of gaps in between so to let the light through.
Now this is where we have a conundrum. As mentioned earlier, ideally we would like all of the incident light to get to the photo-active material. On the other hand we also want the contact to be large enough to capture all the excited electrons. A large opaque contact would block the light. Hence the need for either transparent contact layer which can be expensive, or a mesh, which won’t be able to capture all excited electrons meaning we would have a very inefficient solar cells
Is there a solution to this? Yes there is.
This is where we can appreciate the addition of an extra layer on top of the photo-active material which can act as a net for excited electrons. It is normally termed as electron transport layer. The material is also called the N-type semiconductor. And we can have this material added in the form of a very thin transparent layer.
There are two reasons for placing this electron transport layer on top of the photo-active material. First is to catch the excited electrons all across the surface area of the photo-active material. The second is not allowing them to go back. Or in electronic terms not allowing “recombination” of excited electrons with the base photo-active material. Whenever we paint the ETL or an N-type material, than a barrier is automatically created at the interface called depletion layer that blocks, any captured electrons to return. This N-type material layer is kept so thin that it is almost transparent which allows most of the sunlight to reach the photo-active material.
Therefore we need at least four layers to design an efficient cell. Two layers for contacts or current carriers. One for the photoactive material and electron transport material.
The bottom contact can be a simple conductive metal plate. The photoactive layer needs to be thick enough to absorb all the incident light. Or made out of material that has high absorption coefficient. For the ETL we need a thin layer of transparent material and finally for the top contact we need either a conductive transparent ink or a conductive metal mesh, normally an aluminium mesh is used.
Now there are some designs for photovoltaics that may involve more layers. For instance there might be an additional Hole Transport layer on the rear side of the photoactive material, but for brevity, we will not discuss those designs.
For printed solar cells, any non conductive material can be used as a substrate including plastics or papers.
So now let’s look at all the inks that are available in the market that can be used for each of the mentioned layers.
For the photo-active layer there are a variety of ink and paint materials. These include CIGS inks, Pervosike inks of various grades and also organic inks that have fullerene present in them. All of these can be used for the photoactive layer.

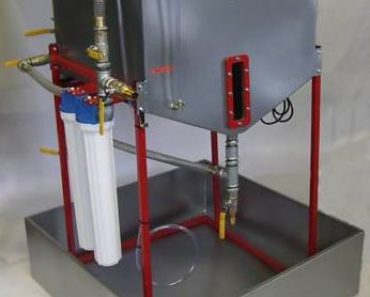
Printed Solar Panel
For the ETL layer or N-type material, again there are a variety of options. These include PCBM inks and ZnO ink. A very thin layer of this material has to be printed or painted so that the layer remains transparent.
For transparent conductive layer at the top, one can use transparent Graphene layer or ITO (Indium Tin Oxide). A meshed conductive wire is also be used. And so is Silver paste.
All these inks are available from different suppliers. Some of them are very low price while others are expensive (for eg Perovskite inks).
You can find all of the mentioned inks easily available on the internet. The inks that are printable by inkjet printers need fluidizing agents to lower the viscosity and therefore are more pricey.
Here are the prices for some of them:
Zinc oxide nanoparticle ink 5 ML 50.5 GBP 68 USD
Zinc oxide ink for inkjet printing 25 ML 175 GBP 233 USD
ITO ink (Cures at 230 degree C) – US$ 800 / kg
Conductive Silver in 10 ml £9.40 12 USD
Production Ink for Organic active material Euros 465 for 25 ml. 518 USD
Phenyl C61 Butyric Acid Methyl Ester 211 GBP for 100 MG 282 USD
Note that some of the inks need to be dried before the next layer is printed, and there is a curing time associated with these inks.
Making Inks at Home
There are a lot of people who have created their own inks for photo-active material using ingredients which you can find in the kitchen. For example, people have made ink using berry juice. Others have used super glue etc. You can find these homemade recipes for various photo-voltaic ink on Youtube and other web-pages.
On a similar note, Graphene can be extracted from pencil lead using the well known scotch tape method. The Graphene flakes can then be used with a binding agent to form the transparent contact at the top. Although the process is quite tedious.
The cells made by printing in almost all cases have lower efficiency than the cells in the market. However, enthusiasm in printing solar panels hasn’t waned. This is despite the fact that two large scale solar cell printing companies including Nanosolar have gone into administration.
The reason of excitement for printable solar panels is this fascinating idea of being able to print solar panels on any substrate flexible or otherwise. Furthermore it is a low cost and very productive method that is exactly like printing newspapers from a printing press. Both inkjet printers and reel to reel printers can be used.
Imagine that by using these inks, someday we will be able to simply paint our walls and convert them into solar panels. It is this potential that keeps both the researchers engaged and the investors interested.